Ordering changes via file naming conventions
Categories:
4 minute read
Purpose
This page contains a step-by-step example of using a naming conventions to minimise provisioning errors when deploying a simple web server.
Prerequisites:
- A working kubernetes cluster
General Information
TLDR: Use a naming convention with a number at the start of the file (e.g., 01_application_servicename.yaml) when giving kubectl lists of files or full directories of yamls to apply on a cluster, so that kubernetes apply changes in an order you can specify.
Skip to Instructions for a full worked example.
The order in which Kubernetes objects are initialised can be critical e.g., if you try to create a service in a namespace prior to creating said namespace then things will fail and you are going to have a bad time. The standard client and server will simply try to apply changes procedurally in the order present to them. This can commonly cause issues when administrators or new team members are provisioning an environment from scratch instead of the more common practice of applying changes on top of an always-influx development environment. These ‘dirty’ development environments generally have no configuration controls, or change management, tend to have broken automation and can be a source of thankless tech debt. The below example is my preferred minimalistic approach to organising a simple applications ( i.e., non-critical internal apps, MVPs, POCs etc) in kubernetes with just enough convention to keep a non-critical environments somewhat ‘clean’ enough aka repeatable and organised with as little overhead as possible.
If you have to do anything more complicated than running a simple non-critical web service then the standard suggested route should be to use ‘kustomize’ (kubectl -k) to manage your kubernetes environments. It was created to address common issues arising from normal development requirements via a kubernetes styled templating approach and it excels at lessening the overhead of maintaining multiple environments such as dev/staging/prod, and can help when automate more advanced CI/CD goals such as creating ephemeral test environments to allow of atomic styled ‘per feature branch’ or ‘per commit’ test runs. As a general rule try and avoid/ignore more work Helm complexity until you can’t avoid it.
Most sane idiomatic kubernetes users attempt to work declaratively, that is they ‘declare’ a desired state in yaml files.
As such it can be helpful when starting off with Kubernetes to think of it as a simple state machine, where users simply save a desired state in yaml and send it up to the cluster, which then attempts to change its current state to match the users desired state. Before the cluster makes any changes, each object’s desired state is syntactically validated, any references are checked and formatted by both the client and the server. Some of the more mature setups extend these checks with custom rules e.g., Open Policy Agent, but don’t fall into the trap of thinking everything is foolproof.
Naming Conventions
The order in which Kubernetes objects are initialised matters, especially when bring environments first online. Luckily Kubectl like most CLI tooling respects the underlying ordering of yaml files via their file name. Hence, I like to follow the following naming convention:
<order>-<kubernetes object type>_<description>.yaml
-
Orderis numeric and is used to ensure that objects are applied in the correct order. -
kubernetes object typeis the shorthand for object described in the yaml file. For a full list of objects available on your cluster and their respective shortnames, trykubectl api-resources. -
descriptioncontains a word or two as a reminder of what the object is for and how it will be used.
Instructions
- Open a terminal window and create a directory to store files.
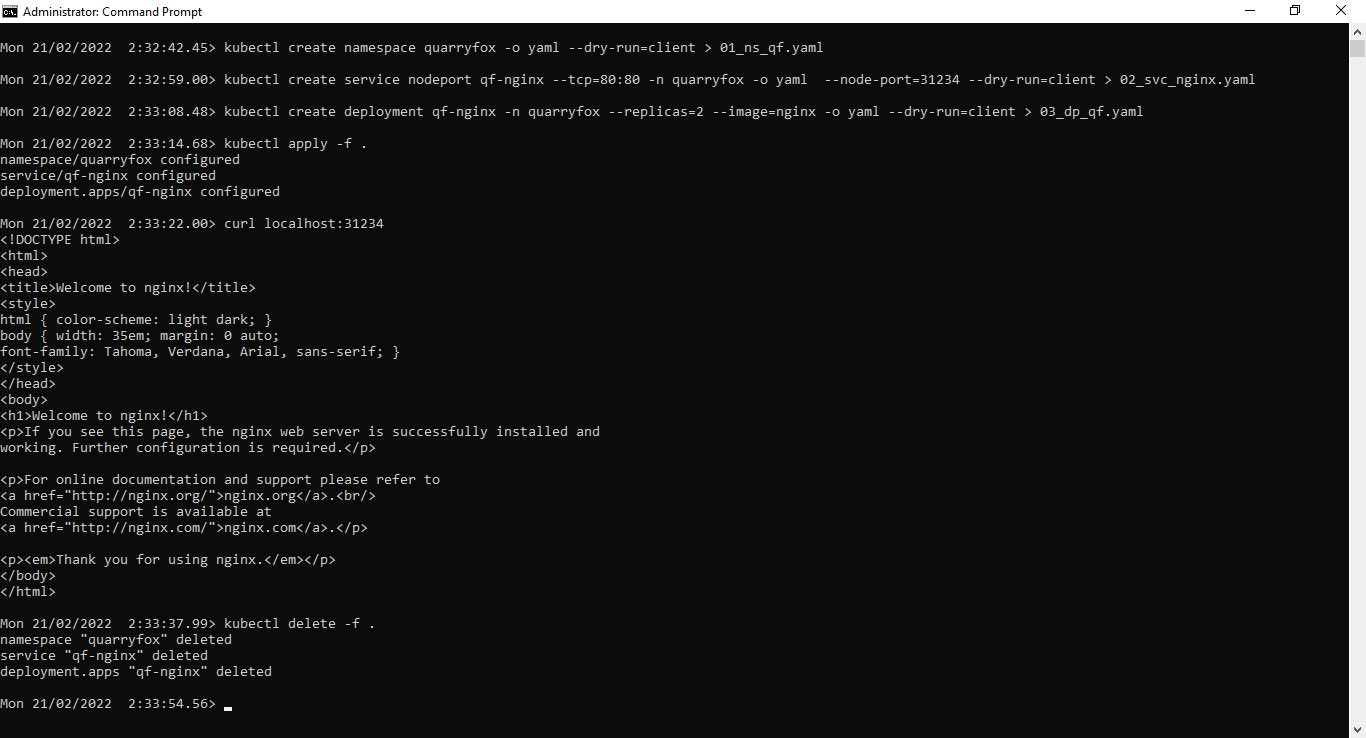
md %TEMP%\naming_convention_example; cd %TEMP%\naming_convention_example
- Create namespace yaml
kubectl create namespace quarryfox -o yaml --dry-run=client > 01_ns_qf.yaml
- Create Service yaml
kubectl create service nodeport qf-nginx --tcp=80:80 -n quarryfox -o yaml --node-port=31234 --dry-run=client > 02_svc_nginx.yaml
- Create Deployment yaml
kubectl create deployment qf-nginx -n quarryfox --replicas=2 --image=nginx -o yaml --dry-run=client > 03_dp_qf.yaml
Note: By creating a deployment only after the service is up, we are giving the Kubernetes scheduler a hint that the PODs for the deployment should be fanned out across multiple nodes.
- Apply state/yaml files on the cluster
kubectl apply -f .
- Verify
curl localhost:31234
- Clean up
kubectl delete -f .
Note: In practice since kubectl processed 01_ns_qf.yaml first, the namespace was deleted and everything in it is deleted. However, some kubernetes objects are global or simply not namespace limited, so it is best to simply delete everything created if possible via the original yaml files.
Instructions screenshot

External links
- See Kubectl GitHub issue for the discussion on how kubectl will not be addressing the need to order files passed via
kubectl apply, even though some errors are somewhat knowable prior to asking the Kubernetes cluster to apply changes that will cause fail states. - ‘Jeffrey Regan’ one of the leads on Kustomize SIG (special interest group) has given a number of good talks at conferences that are available online, they are well worth watching to start to understand the value of using Kustomize and keep up to date on upcoming improvements.
- Weaveworks Gitops Intro to OPA
Feedback
Was this page helpful?
Glad to hear it! Please email us tell us how we can improve, feedback@quarryfox.com.
Sorry to hear that. Please email us tell us how we can improve, feedback@quarryfox.com.